Nothing says Spring quite as much as a set of pink lips. This Spring, a bold almost fuschia lip (but with less purple in it) as made an appearance in a big way. Today, I am going to show you how I do a bright pink lip with a Miss Dior circa 1960's feel. Enjoy!
First things first. I have lightly moisturized my face and let the creme sink in. I then take my "Stay, Don't Stray" by Benefit concealer/primer and put it under my eyes and on my lids, creases and up to the eyebrow.
I then reach for my highlighter by Clarins "Instant Light Brush on Perfector"
and use it under my eyes, around my eyebrows to highlight the shape and around my lips to prep them for the bold lip colour. However, if you have very dry skin, skip this step, as it may create flakes.
I filled in my brows using a thin angled brush and a Rock and Republic shadow in "Diffused Saturate"
I then took my Nars "Gaiety" blush and applied it to the apples of my cheeks using a round brush. I used a circular method moving the product from my cheeks to my ears. Everyone who has ever done my makeup used this technique, so I go with the flow. I like a really pink cheek, so I am pretty liberal with the amount I use.
I took the Rock and Republic shadow again and put a light dusting of it on my crease, just for funsies. I then took a clean brush and blended it in.
I love to tightline! Tightlining is lining the waterline under your lid. I find that it adds another dimension of polish to one's look. I love it. It also makes lashes look fuller. By magic!
I used a basic black NYX pencil for this.
I then took my Vincent Longo concealer stick and lined the bottom waterline in a flesh tone. Rumour has it it makes eyes appear bigger!
At this point, I was ready for the liquid liner. When I am doing a 60's inspired look, I like to go a little Cleopatra. I make the line thin near the tear duct and then wing it out to the approaching the end of my eye and then bring it to a point past the corner of my eye. If that makes any sense!
I then do a combo of three mascaras to give a false lash look. I firstly, I use "The Rocket" by Maybelline, followed by "Le Volume" by Chanel and finishing up with "Illegal Lengths". "The Rocket" separates and adds fullness, "Le Volume" brings, well, volume and "Illegal Lengths" add lengthening fibres. All of them are in blackest black.
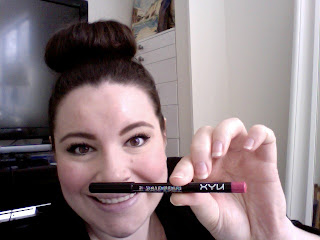
Now is the time for lipliner. I line my lips when using a bold lipstick so that a) I get a more precise line and b) the lipstick won't bleed. For this, I used an NYX lip liner in "Berry".
The lynchpin of this entire operation is "schiap" by Nars. It is a well pigmented lip colour, so a little goes a loooong way. Make sure to blot it. Also, if your lips are dry and tend to flake with lipstick, make sure you brush them with your toothbrush and some water before doing a bold lip.
The next few steps are ones that I forgot to do! To fill you in, I used "Silk Teddy" by Too Faced to highlight under my brows and just in the corner of my eyes. It adds polish and dimension, in my humble opinion. I also grabbed "The Rocket" and gave a very, very light coating of my bottom lashes.
There you have it! I paired "schiap" with this matching cardigan from Talbots and some giant vintage earrings to really make this a 60's look. The shell is super cute and is from JC Penney! It was $12.00. Sadly, it is LONG gone. However, Forever 21 has this and it is quite similar.
Benefit "Stay Don't Stray" Concealer/Primer
Clarins "Instant Light Brush on Perfector"
Rock and Republic Shadow in "Diffused Saturate"
MAC "Superslick Liquid Eyeliner" in "On the Hunt"
Basic Black Pencil Liner
Maybelline "Illegal Lengths" in "Blackest Black"
Maybelline "The Rocket Volum'" in "Blackest Black"
Chanel "Le Volume du Chanel" Mascara in "Black"
Nars Powder blush in "Gaiety"
Too Faced Shadow in "Silky Teddy"
Nars Lipstick in "Schiap"


No comments:
Post a Comment